How to Make No-Bake Peanut Butter Chocolate Bars Easily
No-bake peanut butter chocolate bars—quick, healthy, and protein-packed snacks made in minutes.
DESSERT
Mae Ellison
3/23/20253 min read
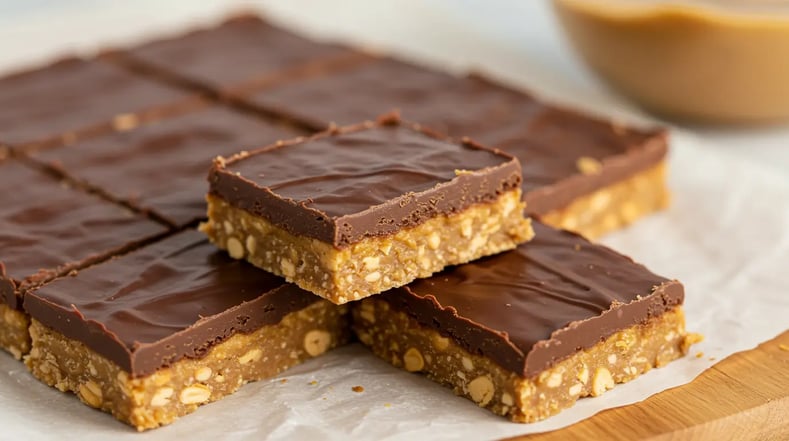
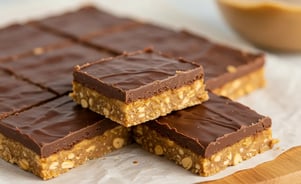
No-Bake Peanut Butter Chocolate Bars
Your Sweet Tooth’s New Best Friend—No Oven Required!
What if you could satisfy your sweet tooth and fuel your muscles—without turning on the oven?
Sound too good to be true? These no-bake peanut butter chocolate bars are here to prove that healthy, high-protein desserts can be easy, delicious, and ready in minutes.
Perfect for meal prep or a quick snack, this recipe is about to become your go-to for guilt-free indulgence.
Why This Recipe Rocks
High-Protein: Packed with Greek yogurt and peanut butter for muscle repair and energy.
Quick & Easy: Ready in 15 minutes (plus chilling time).
No-Bake Magic: No oven? No problem! Just mix, layer, and chill.
Meal Prep Friendly: Make a batch on Sunday and enjoy all week.
Difficulty Level: Beginner (even if you’ve never baked a thing!)
Essential Ingredients
For 1 Person / For 2 People
Peanut Butter: 3 tbsp / 6 tbsp
Adds creaminess and protein. Use natural, no-sugar-added for best results.Greek Yogurt (plain): 1/4 cup / 1/2 cup
Boosts protein and adds tangy flavor.Protein Powder: 1 scoop (30g) / 2 scoops (60g)
Keeps you full and supports muscle recovery.Oats: 1/2 cup / 1 cup
Adds fiber and structure (use gluten-free if needed).Maple Syrup: 1 tbsp / 2 tbsp
Natural sweetness (swap with honey or agave).Coconut Oil: 1 tsp / 2 tsp
Binds ingredients and adds healthy fats.Dark Chocolate Chips: 1/4 cup / 1/2 cup
Rich chocolate layer (use dairy-free for vegan version).Vanilla Extract: 1/2 tsp / 1 tsp
Brings out the sweetness and adds a warm, aromatic touch.
Substitutions & Tips
Nut-Free: Swap peanut butter for sunflower seed butter.
Lower Sugar: Use stevia-sweetened chocolate chips.
Vegan: Use plant-based yogurt and chocolate.
Step-by-Step Instructions
1. Prep Your Base Layer
Mix Dry Ingredients
In a bowl, combine oats, protein powder, and a pinch of salt.
Add Wet Ingredients
Stir in peanut butter, Greek yogurt, maple syrup, coconut oil, and vanilla extract. Mix until sticky and well combined.
Helpful Hint: If the mixture seems too dry, add 1 teaspoon of milk—dairy or plant-based.
2. Create the Chocolate Layer
Melt Chocolate
Microwave the chocolate chips in 20-second bursts, stirring until smooth. Add 1 tsp coconut oil for a glossy finish.
Assembly
Layer 1
Press the peanut butter mixture firmly into a parchment-lined 8x4-inch pan. Use a spatula to smooth out the edges evenly.
Layer 2
Pour the melted chocolate over the base, spreading gently with a knife.
Chill
Freeze for 20 minutes or refrigerate for 1 hour until firm.
Presentation Hack: Sprinkle crushed peanuts or coconut flakes on top before chilling for a gourmet look!
Storage & Make-Ahead Tips
Refrigerator: Store in an airtight container for up to 5 days.
Freezer: Wrap bars individually and freeze for up to 3 months. Thaw in the fridge overnight.
Meal Prep Pro Tip: Double the recipe and freeze half for busy weeks.
Recipe Variations
Crunchy Version: Add 2 tbsp chia seeds or chopped almonds to the base.
PB&J Twist: Swirl in 1 tbsp of sugar-free jam into the peanut butter layer.
Mocha Flavored: Add 1 tsp instant espresso powder to the chocolate layer for a coffee kick.
Conclusion
Who says dessert can’t be healthy and effortless?
These high-protein peanut butter chocolate bars prove that you can have it all. Whether you’re prepping for the week or just need a quick fix, this recipe has you covered.
Go ahead—mix, chill, and enjoy! 🥜🍫
FAQs
Can I use whey protein or plant-based protein powder?
Yes! Both work well. If the mixture is too dry, add 1 tsp milk.
Are these bars vegan?
Absolutely. Just use plant-based yogurt, chocolate, and maple syrup.
How much protein is in one bar?
Approximately 12g per bar, depending on the protein powder used.
Can I skip the oats?
Yes, you can substitute oats with almond flour or crushed protein cereal for a low-carb version.
Why use coconut oil?
It helps bind the ingredients together and adds healthy fats.
Ready to make these? Tag us in your creations we love seeing your kitchen wins!
